3. Authenticating & Connecting
Module 3: Authenticating and Connecting#
Self-hosted or non-managed deployments
This module describes authentication and connection defaults for managed Stadium deployments. If your organization is not using managed Stadium, your specific rules, credentials, and connection steps may vary. Contact your administrator for details.
Before you can explore EDU data, you'll need to log into the warehouse! For most users, that warehouse is hosted by Snowflake, and you'll query directly in Snowflake's web interface or through a desktop SQL client. This module walks through:
- The information and credentials you need to connect
- Security best practices for authentication
- How to log in using Snowflake's web UI (Snowsight)
- How to connect using a desktop client (DBeaver)
What you'll need before you start#
- Account URL: it probably looks like
https://your-organization.snowflakecomputing.com/ - Authentication method: either SSO (Single Sign-On) or username + password with MFA (Multi-Factor Authentication)
- Role / warehouse defaults: your team may set defaults; if not, you'll select them when you query
If you're on Databricks
Some EDU deployments use Databricks instead of Snowflake. The ideas in this training still apply (databases/schemas/tables, SQL querying), but the login/connection steps are different—follow your organization's Databricks access instructions.
Security best practices#
EDU deployments follow strict security requirements to protect student data. Understanding these requirements will help you connect successfully and maintain secure access.
Authentication requirements#
MFA or SSO are strictly required - You will always need to log in with either SSO or password + MFA. This is a mandatory security requirement for all EDU deployments.
- If your organization has set up SSO: Using a password is strongly discouraged, and may even be disallowed. SSO is the preferred and most secure method of authentication. If you need help with SSO setup or have questions, contact your network/IT administrator. The SSO implementation guide is a technical resource designed for network and IT administrators.
- If using a password: Frequent password rotation is strongly encouraged. Choose strong, unique passwords and change them regularly.
- Account sharing is strictly prohibited: Each user must have their own account. Never share your credentials with others, even within your organization.
Service accounts for external connections#
If you wish to connect to the warehouse from an external service (e.g., a BI tool like Power BI or Tableau), you may need to request a service account. As noted above, account sharing is strictly prohibited, so you may not use your personal credentials to power a shared BI environment. See the BI tools connection guide for details on setting up these connections.
Network policies#
Every human and service user of EDU should be subject to network policy rules as an extra line of defense. These policies restrict access to approved IP addresses and networks.
If you encounter a connection error or see a message indicating your IP address is not allowed, ensure you are logged onto your district/organization's VPN or secure network.
If you're still encountering issues after verifying your network connection, reach out to your district/organization's IT administrator. They can forward a network IP range request to the Stadium administrator if necessary.
Home IP addresses
Whitelisting users' home IP addresses is disallowed by default and will only be allowed with a written addendum to the security policy. For remote work, use your organization's VPN or approved secure network.
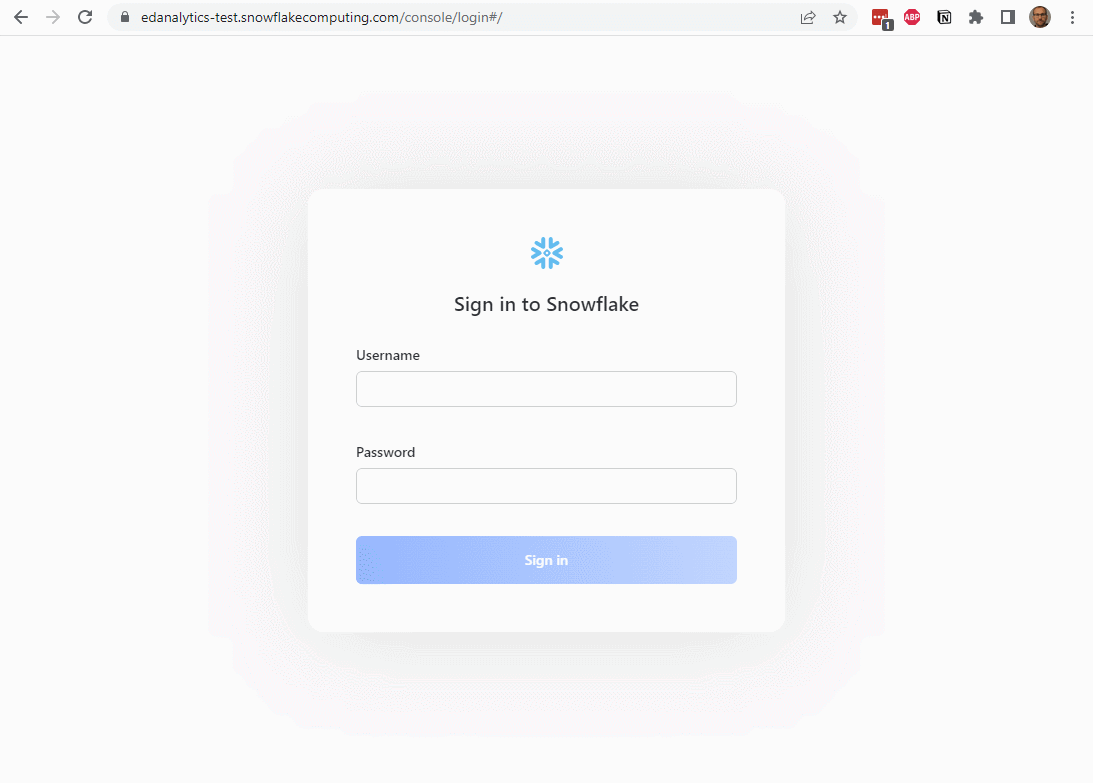
Using Snowsight (Snowflake's web interface)#
Snowsight is the easiest place to start querying your warehouse. It runs entirely in your browser and requires no installation. To access it:
- Go to your Snowflake account's URL, which should look like
https://yourdistrict.snowflakecomputing.com/ - Choose your authentication method:
- If using SSO: Click "Sign in using Single Sign On" and you'll be redirected to your organization's login page
- If using password: Enter your username and password, then complete MFA verification when prompted
- Once logged in, you can write and run queries in a workbook in Snowsight. See this tour of Snowsight for an overview of the interface, or continue to Module 4 - Navigating the Snowflake UI.
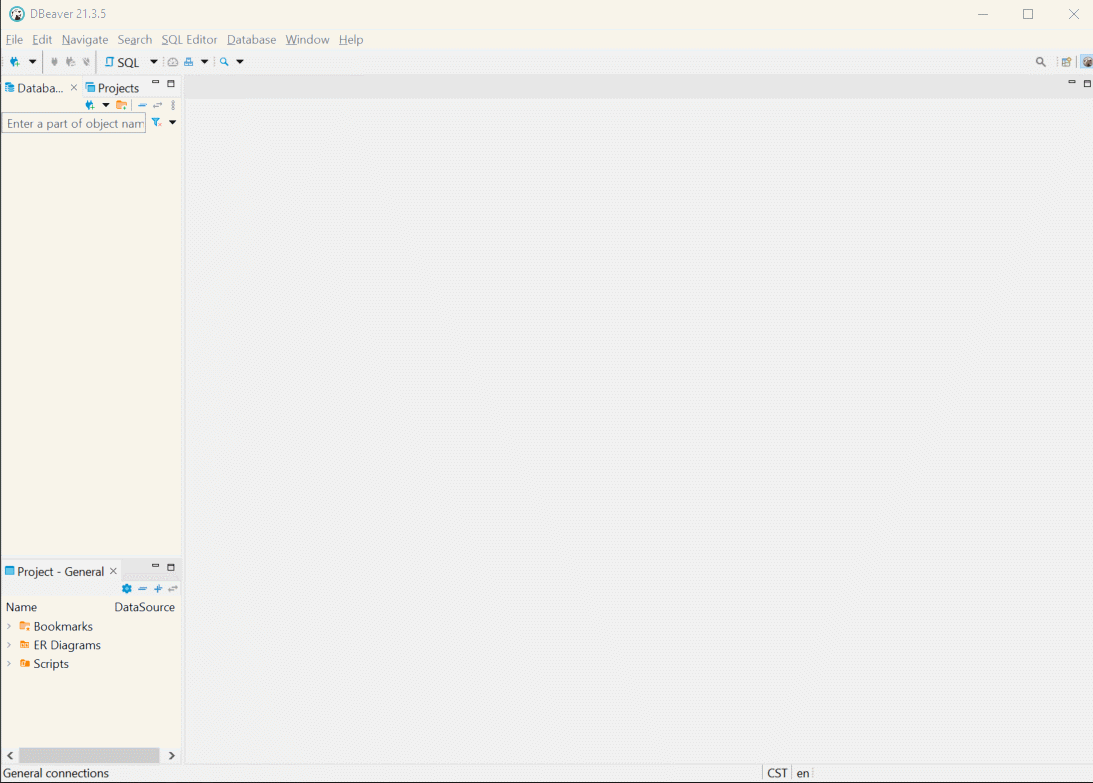
Using a desktop SQL client (DBeaver)#
Some users prefer a desktop client, especially if they work across multiple databases. DBeaver is a popular open-source database querying application. To connect with DBeaver:
- Download DBeaver
- Create a new connection and search for "Snowflake", then click Next
- Enter your connection details:
- Host: Your Snowflake URL (e.g.,
yourdistrict.snowflakecomputing.com) - Database: ANALYTICS
- Warehouse and Schema: You can leave these blank to use defaults, or specify them if needed
- Port: Uses the default 443
In most EDU deployments, you can leave role and schema blank and let Snowflake apply defaults.
Authentication setup#
If you are using SSO: 1. Choose "SSO (Browser)" for Authentication 2. Enter your email address as the Username 3. Leave the Role blank 4. Click Finish to save the connection 5. Right-click the connection in the left sidebar and choose Connect 6. This will open a web browser prompting you to log in via SSO. After authentication, DBeaver will connect to Snowflake
If you are using password authentication: 1. Choose "Database native" for Authentication 2. Enter your username and password 3. Leave the Role blank 4. Click Finish to save the connection 5. When connecting, you'll be prompted for MFA verification
« Understanding Table Structures